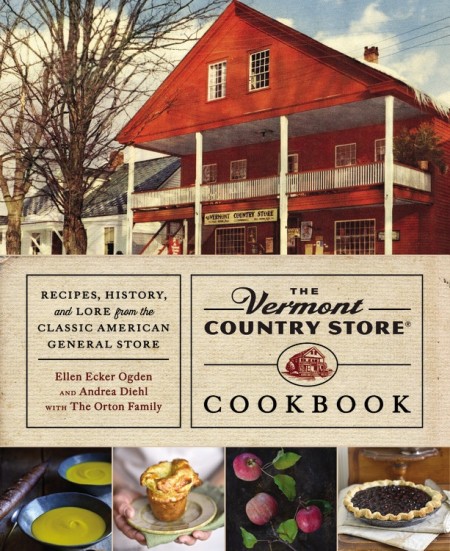
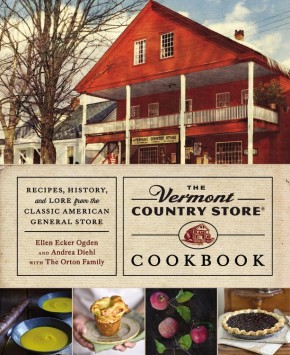
The Vermont Country Store CookbookRecipes, History, and Lore from the Classic American General Store

The ultimate New England store, whose catalog reaches millions of people, presents the store’s first cookbook bringing us back to simpler days.
The Vermont Country Store Cookbook captures both the essence of the iconic store and the soul of the Vermont way of life: a self-reliant, rich life in the slow lane. Through recipes, yarns, archival photos, and sumptuous visuals, it tells the story of five generations of Orton storekeepers, while featuring fresh-from-the-farm cooking that imbues the cuisine of the present with the best of the past. Approximately 120 updated and original family recipes evoke memories, conveying all the hominess of the catalogue, but also appeal to the modern tastes of contemporary cooks. The book also features sidebars of Vermont history and more than 200 photographs, both black-and-white archival and four-color photographs, the latter taken especially for the book.
Ellen Ogden is a food writer, cookbook author, and food stylist. She’s written for The Boston Globe and Martha Stewart Living, among other publications, and has appeared on PBS Victory Garden and HGTV’s Garden Smarts.
Andrea Diehl has been food editor of The Philadelphia Daily News and has written for university presidents and a US attorney. She led the Vermont Country Store’s content team from 2001-2008.
Fire-Roasted Tomato Cheddar Soup with Crunchy Cheese Straws
Creamy Sweet Corn Pudding Soufflé
Maple-Mustard Grilled Rack of Lamb
Aunt Delia’s Ginger Molasses Cookies

Fire-Roasted Tomato Cheddar Soup with Crunchy Cheese Straws
Serves 6 TO 8
The combination of fire-roasted tomatoes and Vermont Cheddar is a time-honored favorite in these parts, with the cheese adding depth and smoothness to the smoky, rich tomatoes. Fire-roast your own fresh tomatoes as we do here, or substitute a can of fire-roasted tomatoes (we prefer Muir Glen Organic) for a quick, satisfying soup ready to ladle into bowls after less than half an hour of simmering on the stove. Serve with crunchy cheese straws (recipe follows).
6 firm ripe tomatoes (or one 28-ounce can fire-roasted tomatoes), halved
2 tablespoons extra-virgin olive oil
1 medium onion, coarsely chopped
2 cloves garlic, minced
1 tablespoon curry powder
4 cups chicken stock
1 cup half-and-half
1 teaspoon fresh thyme, or 1/2 teaspoon dried
8 ounces Cheddar cheese, coarsely grated (2 cups)
1/2 teaspoon salt
1/4 teaspoon freshly ground black pepper
To fire-roast the tomatoes: Build a fire in a charcoal grill and let it burn until the coals are covered with white ash. Or, with a gas grill, turn all the burners to high and heat for 15 minutes. When the grill is ready, place the tomatoes skin side down on the grill. Cook until the skins are blackened, about 3 minutes. Let cool slightly, then peel the tomatoes, coarsely chop, and set aside in a small bowl. If using canned tomatoes, drain and coarsely chop the tomatoes.
Make the soup: In a 2-quart stockpot, heat the oil over medium heat. Add the onion and cook, stirring, until soft and translucent, about 5 minutes. Add the garlic and curry powder and stir for another minute, until fragrant.
Add the tomatoes, stock, half-and-half, and thyme. With a wooden spoon, give it a stir and then bring to a gentle boil. Immediately adjust the heat to maintain a simmer and cook, stirring occasionally, for 15 minutes. Remove from the heat.
Add the cheese, one handful at a time, stirring with a wooden spoon until it is melted. Use an immersion blender to blend the soup directly in the pot until the ingredients have combined, yet are still somewhat chunky. Alternatively, transfer the soup in batches to a blender and pulse to combine— be careful, as the soup is hot. Season with the salt and pepper. Serve warm.
Crunchy Cheese Straws
Makes ABOUT 60 CHEESE STRAWS
Thin, crisp pastry sticks with the tang of cayenne and sharp Cheddar, cheese straws are the perfect appetizer for cocktails or church socials alike, and a fine crunchy accompaniment to top the Fire-Roasted Tomato Cheddar Soup (page 33). The simple dough is rolled out and sliced into “straws.” For a decorative touch, use a fluted ravioli cutter to achieve a crimped edge. A tin of cheese straws makes an excellent hostess gift.
12/3 cups unbleached all-purpose flour, plus more for dusting
1/2 teaspoon sea salt
1 teaspoon dry mustard
1/4 teaspoon red pepper flakes
8 tablespoons (1 stick) unsalted butter, cut into 1/4-inch slices, at room temperature
8 ounces sharp Cheddar cheese, grated (2 cups)
1 to 3 tablespoons ice water
1 egg yolk
2 tablespoons whole milk
2 tablespoons grated Parmesan cheese
Preheat the oven to 425°F.
In a medium bowl, whisk together the flour, salt, dry mustard, and red pepper flakes.
In the bowl of a stand mixer fitted with the paddle attachment, beat together the butter and Cheddar on medium speed until thoroughly combined.
With the mixer running on medium speed, slowly add the dry ingredients to the butter and cheese mixture and mix for 1 to 2 minutes. Add the ice water, 1 tablespoon at a time, allowing 30 seconds between each spoonful of water. Stop when the dough comes together into a ball (you may not need all the ice water).
Turn the dough out onto a lightly floured surface. Knead five or six times, just to bring it together into a cohesive ball. With a rolling pin, press the dough into a rectangle, 1/4 inch thick. Cut strips 1/4 inch wide and 10 to 12 inches in length with a ravioli cutter to give it fluted edges. (If you don’t have a ravioli cutter, use a sharp knife.)
Transfer the strips to two ungreased baking sheets with a spatula, placing them 1/4 inch apart to allow space for expansion. In a small bowl, whisk together the egg yolk and the milk to make an egg wash. Brush the straws with the egg wash and sprinkle lightly with the Parmesan.
Bake for 12 to 15 minutes, until the straws are just starting to look golden brown and crisp. Transfer to a wire rack to cool slightly. Serve while still hot or at room temperature, and store any extras in a resealable plastic bag or airtight container in the pantry for 1 to 2 weeks.

Creamy Sweet Corn Pudding Soufflé
Serves 4 AS MAIN DISH, 6 TO 8 AS SIDE
Soufflés are satisfying, impressive, and easier to make than you might think. In the height of corn season, no one wants to turn on the oven, but this soufflé is worth it. Creamy and delicious, it’s the perfect accompaniment to grilled chicken, steak, or a simple salad. You’ll need fresh corn on the cob, or the corn kernels you so wisely froze in the summer; you can use commercially frozen corn, although the flavor will be compromised, but do not use canned. If you’re feeling extravagant, substitute half-and-half or pure cream for some or all of the whole milk for a decadently rich soufflé. Serve as a main course with salad for a vegetarian kitchen table supper, or as a side dish for a real crowd-pleaser at a dinner party.
3 tablespoons unsalted butter, plus more for the baking dish
6 ears fresh corn, husked
1 cup whole milk
4 scallions or 1 small onion, finely chopped (3/4 cup)
3 tablespoons unbleached all-purpose flour
1 tablespoon finely diced jalapeño
1/2 cup ricotta cheese
2 tablespoons pure maple syrup
1/2 teaspoon salt, plus more as needed
1/4 teaspoon freshly ground black pepper
3 eggs, separated
Preheat the oven to 375°F. Generously butter a 1-quart ovenproof baking or soufflé dish.
Remove the kernels from the corncobs (you should have about 4 cups). In a food processor fitted with the steel blade, puree 2 cups of the corn kernels with the milk until smooth, 1 to 2 minutes. Set a fine sieve over a large bowl and pour in the corn puree. Press on the solids with a rubber spatula to extract all the liquid. Set aside both the liquid and the corn puree left in the sieve.
In a medium saucepan, melt the butter over low heat. As soon as you see it start to brown, add the scallions and cook for 1 minute, stirring with a wooden spoon to keep the butter from browning. Stir in the flour, then whisk in the corn-milk liquid and cook over medium heat, stirring continuously, for 5 minutes, until it starts to thicken. Remove from the heat, stir in the remaining corn kernels, corn puree, jalapeño, ricotta, maple syrup, salt, and pepper.
In a small bowl, slowly ladle a small amount of the hot liquid over the egg yolks while stirring vigorously. Once blended, pour everything back into the saucepan and briskly stir again. (This tempers the egg yolks and keeps them from curdling or cooking too quickly.) Continue stirring over low heat until well blended, then remove from the heat.
In the bowl of a stand mixer fitted with the whisk attachment, or in a large bowl using a handheld mixer, whip the egg whites until they hold firm peaks. Using a rubber spatula, slowly fold the egg whites into the corn-milk base, gently stirring to fully incorporate. Transfer the batter to the prepared dish and set in a large roasting pan. Pour boiling water into the baking pan until it comes halfway up the side of the baking dish.
Bake for 55 minutes, or until the pudding is golden and puffy and is sturdy when jiggled, making sure that the center is firm. Bring to the table hot and serve warm.
Maple-Mustard Grilled Rack of Lamb
Serves 4
A rack of lamb is one of the most elegant cuts of lamb, but is so easy to grill that it shouldn’t intimidate the home cook. Grilling the lamb intensifies the rich flavor of the meat and results in a crusty exterior with a meltingly tender interior. And it looks spectacular coming off the grill.
We got this recipe from Eliot Orton, who usually doubles the recipe when guests come, as two ribs each are rarely enough for hearty omnivores. (Make sure to count the ribs on the rack to ensure everyone gets at least two.) Eliot makes his own charcoal; when you grill this on a wood charcoal fire, you get a smoky, sweet treat. “It caramelizes and gets a super-yummy, sticky mess all over the lamb,” Eliot Notes. What more can we say?
1 (4-pound) rack of lamb
1 tablespoon olive oil
1 teaspoon kosher salt
1/2 teaspoon freshly ground black pepper
1/4 cup Colman’s mustard powder
1 cup pure maple syrup
2 tablespoons dark brown sugar
1/4 cup finely chopped fresh thyme leaves
Take the rack of lamb out of the refrigerator an hour before you intend to grill it. Trim off the excess fat. Rub the lamb with the olive oil and season with the salt and pepper. Let sit, loosely covered with plastic wrap, until room temperature.
Meanwhile, in a small bowl, combine the mustard powder, maple syrup, and brown sugar and mix thoroughly. If you have a mortar and pestle, mash the thyme leaves a bit to extract flavor (the broad side of a chef’s knife works for this, too), then add the thyme to the mixture.
Prepare and light a charcoal grill, grouping the coals to one side to create a two-temperature grilling area. (If using a gas grill, heat the grill with all burners on high for 15 minutes, then turn off one or two to create the same effect. Consider placing a pierced foil packet of hickory wood chips on the grill to impart a smoky flavor.)
Place the lamb on the hottest part of the grill, meat side up, baste with the marinade, and cook for 3 minutes; flip, baste, and cook on the other side for 3 minutes. Be watchful, as lamb tends to flare up. Move the lamb to the low-heat side of the grill, with the meaty portion closest to the high-heat side, cover, and continue to cook, basting and turning often, for 15 minutes or so for rare (120°F), 20 minutes for medium-rare (130º to 135°F). Don’t cook lamb past the medium point, as it will lose much of its natural flavor and tenderness, and remember that lamb will continue to cook as it rests.
Remove the lamb from the grill and transfer to a large serving platter. Let it rest for 10 minutes to redistribute juices throughout the meat. Slice into individual ribs or two-rib servings.

Aunt Delia’s Ginger Molasses Cookies
Makes 48 COOKIES
Ginger cookies have been standard New England fare for decades. We found Aunt Delia’s Ginger Molasses Cookie recipe in several books, always handwritten by different cooks in the family. Her recipe called for 31/4 cups whole wheat flour, no eggs, and a light hand with the spices. We lightened it up and added more ginger and other spices, and a crunchy dusting of sugar. You’ll find them tempting as an afternoon snack or with a bowl of vanilla ice cream. Better yet, stuff ice cream inside two cookies to make a spicy, sweet ice cream sandwich.
2 1/4 cups unbleached all-purpose flour
2 teaspoons ground cinnamon
2 teaspoons ground ginger
1/2 teaspoon ground cloves
2 teaspoons baking soda
1/2 teaspoon salt
1 cup packed light brown sugar
1 cup (2 sticks) unsalted butter, at room temperature
1 large egg, at room temperature
1/3 cup molasses
1/2 cup turbinado or other coarse sugar
Preheat the oven to 350°F. Line two baking sheets with parchment paper.
In a small bowl, stir together the flour, cinnamon, ginger, cloves, baking soda, and salt.
In the bowl of a stand mixer fitted with the paddle attachment, cream together the brown sugar and butter until light and fluffy. Add the egg and beat until blended. Scrape down the sides of the bowl and add the molasses. With the mixer on low, add the dry ingredients and mix until just blended. The batter will be thick and sticky.
Into a small bowl or onto a plate, pour out the turbinado sugar. Using a tablespoon, scoop out a spoonful of dough. Roll it between your palms into a 1-inch ball and then roll it in the turbinado sugar to coat. Place on a prepared baking sheet and repeat with the remaining dough, setting the cookie dough balls about 2 inches apart. For a flatter cookie, press the tops of the dough balls with a fork to flatten them slightly. Or keep them rounded, and they will develop the familiar crack in the top as they bake.
Bake the cookies for 12 to 14 minutes, or until they are golden brown. Transfer to a wire rack to cool.
Excerpted from THE VERMONT COUNTRY STORE COOKBOOK by Ellen Ecker Ogden and Andrea Diehl With the Orton Family. Copyright © 2015 by Ellen Ecker Ogden and Andrea Diehl With the Orton Family. Used with permission of Grand Central Publishing. All rights reserved. Photos Matt Benson.





Leave a Reply