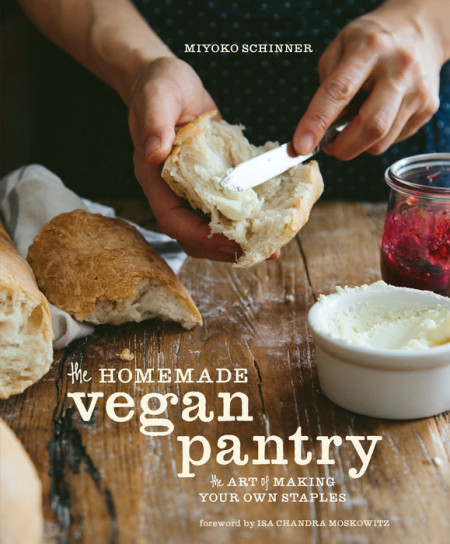


The Homemade Vegan Pantry The Art of Making Your Own Staples
A guide to creating vegan versions of staple ingredients to stock the fridge and pantry–from dairy and meat substitutes such as vegan yogurt, butter, mayo, bacon, and cheese, to mustards, dressings, pancake mix, crackers, pasta sauces, cookies, and more.
Kitchen crafters know the pleasure of making their own staples and specialty foods, whether it’s cultured sour cream or a stellar soup stock. It’s a fresher, healthier, more natural approach to eating and living. Now vegans who are sick of buying over-processed, over-packaged products can finally join the homemade revolution. Studded with full-color photos, The Homemade Vegan Pantry celebrates beautiful, handcrafted foods that don’t take a ton of time, from ice cream and pizza dough, to granola and breakfast sausage. Miyoko Schinner guides readers through the techniques for making French-style buttercreams, roasted tomatoes, and pasta without special equipment. Her easy methods make “slow food” fast, and full of flavor. The Homemade Vegan Pantry raises the bar on plant-based cuisine, not only for vegans and vegetarians, but also for the growing number of Americans looking to eat lighter and healthier, and anyone interested in a handcrafted approach to food.
MIYOKO SCHINNER is a vegan chef, author of three cookbooks (Artisan Vegan Cheese, Now and Zen Epicure, and Japanese Cooking), co-host of Vegan Mashup on the Create Channel, and star of her own online show, Miyoko’s Kitchen. She is a regular cooking instructor in the nationally renowned McDougall Program and at major vegan festivals and events around the country. Her vegan cheese company will begin shipping to natural foods stores in late 2014. Schinner has appeared in numerous publications and on television and radio, including VegNews, Chicago Tribune, LA Weekly, NPR, ABC World News Tonight, San Francisco Chronicle, Washington Post, New York Post, and Eating Well. Visit ArtisanVeganLife.com.
“Miyoko’s recipes for vegan basics are thoughtfully crafted and the photography is so artistic and inspiring that I can hardly wait to start cooking! It is a beautiful book that would make a great gift for any occasion.”
— ALICIA SILVERSTONE, vegan activist, actress, and author of The Kind Diet and The Kind Mama
“Showcasing a mouthwatering array of condiments, stocks, pastas, classic comfort foods, and more, The Homemade Vegan Pantry will show you how fun and delicious it can be to make your favorite food staples at home. Miyoko’s culinary genius shines through in every recipe and the photos are nothing short of sublime!”
— JASON WROBEL, celebrity vegan chef and host of How to Live to 100 on the Cooking Channel
“The Homemade Vegan Pantry makes world-class vegan dishes possible for everyone at every skill level. This is all thanks to Miyoko, a chef who…brings a passion to her recipes that gets both herbivores and omnivores excited.”
— ISA CHANDRA MOSKOWITZ, author of Isa Does It
Well-crafted macaroni and cheese mix
UnRibs-Zippy barbecue sauce
Chocolate cake and baking mix-classic brownies![]()
Well-crafted macaroni and cheese mix
Unless you were raised by macrobiotic hippies, you’ve had it. I’ve had it. And there’s no shame in saying it— we’ve all had macaroni and cheese out of the box. My kids would plead with me to buy it, and I was thrilled when the vegan stuff came on the market. Maybe you don’t crave it anymore, but it sure is convenient to have some on hand for the kids or the babysitter. But there’s no need to buy it, because you can make the instant cheese sauce mix yourself in just a few minutes! This version is richer than the variation that follows, utilizing glorious cashews.
1 cup cashews
3/4 cup nutritional yeast
1/4 cup oat flour
1/4 cup tapioca flour
1 tablespoon paprika
1 tablespoon organic sugar
2 teaspoons powdered mustard
2 teaspoons sea salt
2 teaspoons onion powder
Add all of the ingredients to a food processor and process until a powder is formed. There should not be any discernible chunks or large granules of cashews, so this may take 3 to 4 minutes of processing. Store this in a jar or portion out into 1⁄3-cup increments and put in ziplock bags and store in the pantry for a month or two or in the refrigerator for up to 6 months.
MAKES 1 2/3 CUPS, OR ENOUGH TO COAT THE EQUIVALENT OF 5 STORE-BOUGHT BOXES INSTANT MACARONI AND CHEESE
HOW TO USE WELL-CRAFTED MACARONI AND CHEESE MIX
Cook 1 cup of dry macaroni according to package instructions and drain. Combine 1⁄3 cup mix with 1 cup water or unsweetened nondairy milk in a saucepan over medium-low heat. Whisk well and bring to a boil. Simmer for 1 minute, then toss with hot cooked macaroni.
These mixes are also a great answer for turning yesterday’s leftovers into a quick casserole. Just combine leftover pasta, potatoes, or grains, some veggies, and any other odd scraps you think might be a good fit and mix it in a casserole dish with some of the cheese mix and water. You can add additional spices and herbs if you wish. Then bake it all up into creamy goodness. You can also use the mix to make quick sauces for veggies or add it to soups for extra cheesy flavor and richness—it’s quite versatile.![]()
UnRibs-Zippy barbecue sauce

Here’s another recipe that hearkens back to the days when I produced commercial meat substitutes. On the days we made UnRibs, you’d walk into the factory and get hit by the smoky smells of garlic, spice, tomatoes, and chiles wafting in the air. It would permeate my clothes, and I’d go home smelling like one giant rib. I’d grab several packages on my way out, and my kids would chomp on them right out of the bag. Ah, those were the days.
Recently, I found the old recipe. It starts out calling for 250 pounds of vital wheat gluten. Well, a few adjustments had to be made, of course. But over the years, I’ve had people ask me if I was ever going to include the UnRib recipe in a book . . . so here it is (almost). These are quite addictive, and I have to hide them from myself so I don’t keep eating them. They really improve in flavor from sitting for a day or two, so make them ahead if you can. Then just keep them around for noshing.
To make it easier for folks, I’ve changed the technique slightly, giving you the option of making them low-fat or not. When I think of ribs, the words smoky, chewy, and savory certainly come to mind, but the word that tops it all is greasy. That flavorful grease dripping down your chin is one of the highlights, don’t you think? Maybe not . . . so there’s a version for you, too! Both versions are tasty, and I enjoy them both. Make a bunch, freeze them, and you can thaw, slice, and cook them whenever you want.
1/4 cup soy sauce
3 tablespoons nutritional yeast
2 tablespoons smooth peanut butter
2 tablespoons tomato paste
1 tablespoon white, chickpea, or red miso
4 or 5 cloves garlic
11/4 cups water
21/2 to 3 cups vital wheat gluten
Oil, for cooking (optional)
SAUCE
31/2 to 4 cups Zippy Barbecue Sauce (recipe below) or your favorite store-bought variety
2 cups water
In a food processor or blender, combine the soy sauce, nutritional yeast, peanut butter, tomato paste, miso, garlic, and water and process until a smooth and creamy slurry is created. If you are using a food processor, just keep everything in there; if using a blender, pour it out into a large mixing bowl. Add 21⁄2 cups of the gluten to the slurry and mix well, either using the food processor or by hand in the bowl. If you’re using a food processor, keep pulsing to knead the dough, adding a little more gluten flour as necessary to form a stiff dough (the more gluten you add, the chewier your ribs will be, so you can control how tender or chewy you want them). It may form one ball in the center or break up into little beads; if the latter happens, all you have to do is push it together with your hands. If you’re mixing it by hand, knead it in the bowl for several minutes until it becomes smooth.
Roll the dough into a log about 6 inches long. Slice the log lengthwise into four “steaks” about 3⁄4 inch thick. Now here’s one of the places where you get to decide whether or not to use oil, and how much. Heat a skillet over medium-low heat—if you’re going for oil-free, make sure that it is nonstick. If you’re using oil, add a couple of tablespoons to the skillet and let it get hot. Add the steaks and cook until browned on both sides. They will rise and puff a little.
Preheat the oven to 350°F. If your skillet is ovenproof, you can just leave the steaks in the pan. If not, transfer them to a baking dish. Mix 11⁄2 cups of the barbecue sauce with the water. Pour the diluted sauce over the steaks in the pan and cover with a lid or aluminum foil. Bake the ribs for 75 to 90 minutes, until the sauce has reduced and just barely coats them and the steaks are chewy and cooked through. They will be relatively tender while hot but will deflate slightly and become chewier as they cool, so fear not if they seem too soft right out of the oven.
Let them cool until they can be handled without burning your fingers. Then slice each steak lengthwise into “ribs” about 1⁄3 to 1⁄2 inch thick. Heat the skillet over medium-low heat. You’re going to sauté the individual ribs once more to brown or even blacken them on both sides. Once again, you can choose to oil or not to oil. If you like your ribs on the greasy side, you’ll want to use a good 4 to 6 tablespoons of oil to sauté them. Or you can just use a dry nonstick skillet. Cook them all until nicely dark on both sides (I like them almost black). Then toss them with the remaining 2 to 21⁄2 cups barbecue sauce. Now you can dig in. Or wait until the next day, when they will have deepened in flavor and become even chewier. To reheat, just throw them in the oven or on the grill, or eat them cold with some potato salad—yum! Store in an airtight container in the fridge for up to 1 week or in the freezer for up to 6 months.
MAKES 8 TO 10 SERVINGS
Zippy barbecue sauce
This is a well-balanced barbecue sauce for UnRibs, tofu, tempeh, or anything else where you want to capture that Fourth of July flavor. It’s got just the right amount of sweetness balanced by acidity, heat, and spice. If you prefer your sauce on the sweeter side, feel free to increase the sweetener.
2 (6-ounce) cans tomato paste
1/2 cup maple syrup or organic sugar, or 3/4 cup coconut sugar, or more as desired
1/3 cup soy sauce
1/4 cup apple cider vinegar
2 tablespoons molasses
1/2 to 1 teaspoon liquid smoke
6 cloves garlic, minced
2 chipotle peppers in adobo sauce (canned), minced
2 tablespoons chili powder
1 tablespoon smoked paprika
2 teaspoons ground cumin
1 cup water
Combine all of the ingredients in a bowl and whisk together well or mix in a blender or food processor. Store this in a jar in the refrigerator for 2 to 3 months.
MAKES ABOUT 31⁄2 CUPS![]()
Chocolate cake and baking mix
With this in the pantry, you’ll have no reason to deny yourself a chocolate fix when the mood strikes. If you’re looking for that perfect chocolate cake—rich, complex, but light—look no further. How about deep, fudgy brownies (pictured opposite)? It’s right here. Or almost guilt-free and oil-free chocolate muffins? Got those covered, too. Best of all, if you have kids like mine who tell you at ten o’clock at night that they need a treat to take to school the next day, you’ll be the supermom who can whip out amazing desserts “from scratch” in moments.
3 cups whole wheat pastry flour
3 cups unbleached flour
41/2 cups coconut sugar, or 4 cups
organic sugar
11/2 cups cocoa powder
(not Dutch-processed)
6 tablespoons very finely ground coffee (espresso grind)
2 tablespoons baking soda
1 tablespoon ground cinnamon
1 tablespoon sea salt
Sift together all of the ingredients into a large bowl, then using a wire whisk, mix well until the mixture looks perfectly combined. Alternatively, you can use an electric mixer or food processor. Store in an airtight container or ziplock bags at room temperature for 3 to 4 months.
Makes 12 cups
classic brownies
This is the kind of brownie that is crackled on top, with a dark, fudgy center, deep in buttery flavor, and totally satisfying.
6 ounces dark chocolate
1/2 cup Glorious Butterless Butter
1 tablespoon ground chia seeds
3 tablespoons water
2 cups Chocolate Cake and Baking Mix
1/4 cup maple syrup
1/2 cup chopped walnuts or pecans (optional)
Preheat the oven to 350°F. Line an 8-inch square baking pan with parchment paper and grease the sides. In a double boiler, melt the chocolate and butter together. In a small bowl, mix together the chia seeds and water. Put the cake mix in a large bowl and make a well in the center. Pour in the melted chocolate mixture, chia seed mixture, and syrup and mix well. Stir in the nuts. Pour the mixture into the pan. Bake for 20 minutes. It will look dry on top but will still be soft inside. Allow it to cool completely before cutting and serving.
MAKES ABOUT 16 BROWNIES
Reprinted from THE HOMEMADE VEGAN PANTRY Copyright © 2015 by Miyoko Schinner. Photographs © 2015 by Eva Kolenko. Published by Ten Speed Press, an imprint of Penguin Random House LLC.
~ Related Books ~


Leave a Reply