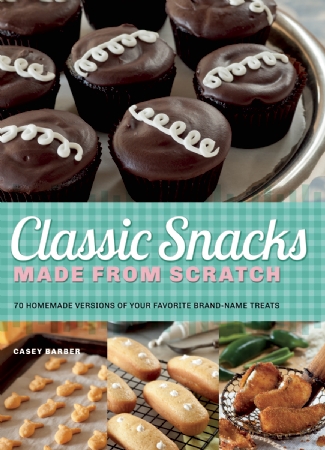


Classic Snacks Made from Scratch70 Homemade Versions of Your Favorite Brand-Name Treats
Create all-natural, handcrafted versions of classic favorite treats like chocolatey imitation Oreos, salty home-cooked potato chips, fluffy DIY Twinkies and many more.
Everyone has a guilty pleasure — a couple of Nutter Butter® cookies after lunch, Cheetos® while watching sports on TV, or maybe a poolside Fudgesicle® on a hot summer day. And who’s to judge? There’s nothing wrong with a little indulgence! Except that brand-name snacks are often packed with unhealthy preservatives, unnatural colorings, and unwanted chemicals. This book answers the junk food dilemma by serving up recipes for delicious versions of everyone’s favorite nostalgic treats using high-quality, all-natural ingredients. All the recipes promise to faithfully reproducing beloved snacks and vending machine treats in a home kitchen using unprocessed ingredients like real cream, rich butter, and freshly ground spices. Not surprisingly, the resulting delights far surpass the flavor of the originals. With 70 recipes ranging from quick and easy Wheat Thins® to multistep wonders like hot-out-of-the-toaster, fruit-filled Pop-Tarts®, Classic Snacks Made from Scratch will appeal to everyone who craves delicious treats with more flavor and less guilt. Health-conscious adults will finally get to reintroduce their taste buds to childhood joys like splitting open a chocolate sandwich cookie and sampling the creamy happiness of the filling first.
Casey Barber is a New Jersey–based freelance food writer, recipe developer, and editor of the online magazine Good. Food. Stories. She is an iVillage contributing writer and Serious Eats columnist, and her work has also appeared in ReadyMade, Gourmet Live, Better Homes & Gardens, DRAFT, Time Out New York, and many other print and online publications.
Snack food enthusiast and burgeoning ukulele player Casey Barber talks to us about her book Classic Snacks Made from Scratch.
Have you always been a fan of ‘snack’ foods?
I’ve definitely been a fan of snack foods long before I was a fan of “real” food – I fondly remember breakfast cereals, Fun Fruits, Fruit Roll-Ups, Kid Cuisine, Pudding Pops, and more as keeping me occupied (and filled-up) during my formative years. I’m also a big fan of nostagia and retro items, so the combination of old, sometimes oddly packaged and designed things that just happen to be foods is like catnip.
How did you get involved in recreating snack foods at home?
It was basically on a dare – I’d been an avid experimental cook for a number of years, and my husband essentially challenged me to start re-engineering Oreos, Cheez-Its, and our other favorite snack foods… just to see if it could be done. I parlayed that into a recurring magazine assignment for ReadyMade magazine (RIP), then realized there were so many snacks and treats out there that struck a chord for so many people that I could probably write a book about it. And I did.
What makes a good snack food?
It’s a combination of the right texture and the right flavor. For me, Peeps are pretty gross, because they have basically no flavor despite an intriguing texture; if you made them lemon or cherry, they might be interesting enough to work. Fritos, on the other hand, are the near platonic ideal: crunchy, salty, fatty, a little sweet – they’re perfection.
Was it hard to figure out the recipes?
I’m not going to lie – it was a little daunting to look at a list of 70 snacks and think, “ok, I have to make all of these snacks from scratch!” But once I got into the groove of deconstructing each snack, literally pulling it apart into its constituent parts, it wasn’t as difficult as I thought it would be. Every packaged snack has a homemade origin: Twinkies are sponge cakes, Sno-Balls are upside-down cupcakes covered in marshmallow, Sour Patch Kids are just really tangy Jell-O candies, for instance. It’s all about being able to unlock that puzzle.
Can you tell us a little about Goodfoodstories.com?
Good. Food. Stories. is based on the idea that everyone has a story about food – everyone has a memory, an anecdote, an experience with food that shaped them, changed them, or connects to another part of their life in a meaningful way. So I love to share these stories with the world at large, as well as explain techniques, ingredients, and other aspects of cooking that might seem mystifying but are in fact simple and helpful when you get right down to it. The site will be four years old this July, and it’s the most satisfying work I do.
What are you working on now?
Oh, about 500 different things! In addition to cookbooks and Good. Food. Stories., I freelance for a number of outlets, ghostwrite for corporate clients, do cooking workshops, and look for new places to publish my work. This year’s goal is to become a cicerone, or beer sommelier – and learn to play the ukulele!
Goldfish® Crackers
Hostess® Chocolate Cupcakes
Goldfish® Crackers

“I love fishes cause they’re so delicious!” Was there ever a more accurate jingle in the history of Saturday-morning snack food commercials? The light crunch, adorable shape, and notably unfried makeup meant kids could nearly always con their parents into buying a bag for the lunchbox. We are all utterly powerless in the face of Goldfish. And can’t we all agree that the Cheddar fish are the top dog in Goldfish flavors?
YIELD: 10 to 15 dozen crackers (depending on cookie-cutter size)
TOTAL TIME: 1 hour
DIFFICULTY: 2
SPECIAL EQUIPMENT: goldfish-shaped cookie cutter
1 cup (4 ounces) very finely shredded sharp Cheddar cheese
½ cup (21⁄8 ounces) unbleached all-purpose flour
½ cup (21⁄8 ounces) cake flour
1 tablespoon Cheddar cheese powder (see page 12)
1 teaspoon kosher salt
½ teaspoon baking powder
¼ teaspoon onion powder
¼ cup whole or reduced-fat milk
1 tablespoon vegetable oil
MAKE THE DOUGH:
Stir the cheese, flours, Cheddar powder, salt, baking powder, and onion powder together in a large bowl until the cheese is evenly distributed and coated. Add the milk and vegetable oil and continue to stir with a spatula, then knead in the bowl with your hands until a cohesive dough forms. It will be crumbly at first, but continue to press and knead the dough until any dry bits are incorporated.
Transfer the dough to your work surface, cover with the upside-down bowl, and let rest for 10 minutes.
MAKE THE CRACKERS:
Preheat the oven to 375˚F. Line 2 baking sheets with parchment paper or Silpat liners.
Divide the dough into 2 pieces. Refrigerate one piece while you roll the second piece as thin as humanly possible, no more than ⅛ inch thick. (The thinner your dough, the crispier your crackers will be; thicker dough means puffier, more bread-like crackers.)
Stamp out cracker shapes with your cookie cutter of choice: a fish is the traditional shape, of course, but the crackers taste just as good as hearts, stars, circles, or small squares. Transfer the shapes to the prepared baking sheets.
Bake for approximately 15 minutes, until the crackers are crispy and just turning golden at the edges. The timing will vary according to the size and shape of your crackers. Transfer to a wire rack and let cool completely.
The crackers will soften when kept in an airtight container, so they’re best eaten within a day or two.
YOUR OWN SCHOOL OF FISH
Want a tiny goldfish cookie cutter to make your crackers look just like the real thing? Find the perfect version at coppergifts.com.
Hostess® Chocolate Cupcakes

For most of us, something about that little doodle of white icing against the chocolate glaze makes this a little more special and a little more nostalgic than a plain frosted chocolate cake.
YIELD: 12 cupcakes
TOTAL TIME: 3 hours, including chilling time
DIFFICULTY: 4
SPECIAL EQUIPMENT: stand mixer, standard 12-cup muffin tin, pastry bag (or zip-top bag) with small round piping tip
CUPCAKES
1¼ cups (53⁄8 ounces) unbleached all-purpose flour
½ cup (1½ ounces) unsweetened cocoa powder
½ teaspoon baking powder
¼ teaspoon kosher salt
8 tablespoons (4 ounces) chilled unsalted butter, cut into ½-inch cubes
1 cup (7 ounces) granulated sugar
2 large eggs
1 teaspoon vanilla extract
1 cup whole or reduced-fat milk
FILLING
2 large egg whites
½ cup (3½ ounces) granulated sugar
½ teaspoon vanilla extract
¼ teaspoon cream of tartar
CHOCOLATE FROSTING
2 cups (8 ounces) powdered sugar
2 teaspoons light corn syrup
½ teaspoon vanilla extract
¼ cup whole or reduced-fat milk
3 ounces semisweet chocolate, coarsely chopped (a scant ½ cup)
WHITE DOODLE ICING
½ cup (2 ounces) powdered sugar
1 teaspoon whole or reduced-fat milk
1 teaspoon light corn syrup
MAKE THE CUPCAKES:
Preheat the oven to 350˚F. Spritz the wells of a standard 12-cup muffin tin with baking spray.
Whisk the flour, cocoa powder, baking powder, and salt together in a large bowl, sifting if needed to remove any lumps.
In the bowl of a stand mixer fitted with the paddle attachment, beat the butter and sugar together for 2 to 3 minutes on medium speed, until the butter is pale and fluffy. Reduce the mixer speed to low and add the eggs one at a time, mixing thoroughly before adding the next. Add the vanilla and stir for 15 seconds to combine.
Add a third of the flour mixture, mixing on low until just combined, then half the milk. Repeat with a third more flour mixture and the remaining milk, then the final portion of flour.
Divide the batter evenly among the prepared muffin wells. Bake for 15 to 20 minutes, until the cupcakes are set in the middle. Remove the cupcakes from the muffin tin and let cool to room temperature on a wire rack.
MAKE THE FILLING:
While the cupcakes are cooling, fill a small, straight-sided saucepan halfway with water and bring to a simmer over medium-low heat. Place the egg whites and sugar in a heatproof stainless steel or Pyrex bowl and set the bowl over the simmering water. Whisk continuously for 1 to 2 minutes, until the sugar dissolves and the liquid is slightly opaque, frothy, and warm to the touch.
Transfer the whisked egg whites to the bowl of the stand mixer. Using the whisk attachment, whip on medium-high speed for about 2 to 3 minutes, until the liquid becomes opaque and glossy. Add the cream of tartar and vanilla and whip for 1 to 2 more minutes, until the marshmallow mixture forms stiff peaks when the mixer is turned off and the whisk is lifted.
MAKE THE FROSTING:
Stir the powdered sugar, corn syrup, vanilla, and milk together in a heatproof metal or glass bowl. Place over the pan of simmering water and cook, stirring, until warm to the touch. Add the chopped chocolate and cook, stirring constantly, until the chocolate is melted. Remove from the heat.
ASSEMBLE THE CUPCAKES:
Use a sharp paring knife to cut a deep, wide hole in each cupcake, leaving a ½-inch border of cupcake. Spoon filling into each hole, using a mini silicone spatula or spoonula, and smooth flush with the top of the cupcake.
Dip the top of each filled cupcake in the chocolate frosting, letting excess glaze drip back into the bowl. Set on a wire rack to allow the glaze to set for at least 30 minutes.
MAKE AND PIPE THE DOODLE ICING:
Whisk the powdered sugar, milk, and corn syrup together in a small bowl until a thick glaze forms. Fill a pastry bag or gallon-size zip-top bag with a small round piping tip with the icing (see How to Fill a Pastry Bag, page 187).
Pipe circles of icing down the center of each cupcake. Allow the cupcakes to sit for at least 1 hour so the frosting and icing can firm up.
The cupcakes can be made a day in advance and kept at room temperature. They should be eaten within 3 days.
Photos courtesy of Ulysses Press/Judi Swinks Photography
~ Related Books ~