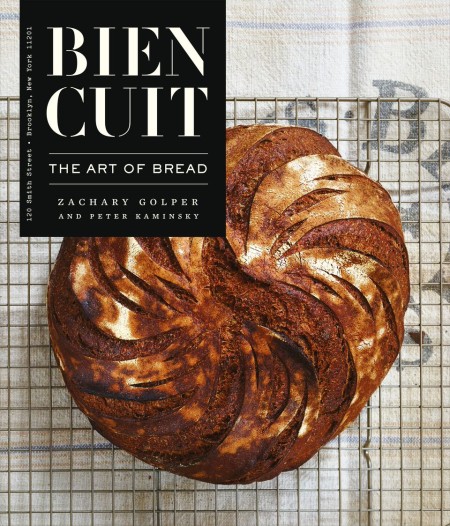


Bien CuitThe Art of Bread
And Peter Kaminsky
Photography by Thomas Schauer

One of the world’s most celebrated bakers shares his insider’s secrets to making his delicious, artisanal bread that will have home bakers creating professional-quality products in no time—and inexpensively.
Bien Cuit introduces a new approach to a proudly old-fashioned way of baking bread. In the oven of his Brooklyn bakery, Chef Zachary Golper creates loaves that are served in New York’s top restaurants and sought by bread enthusiasts around the country. His secret: long, low-temperature fermentation, which allows the dough to develop deep, complex flavors. A thick mahogany-colored crust is his trademark—what the French call bien cuit, or “well baked.” This signature style is the product of Golper’s years as a journeyman baker, from his introduction to baking on an Oregon farm—where they made bread by candlelight at 1 a.m.—through top kitchens in America and Europe and, finally, into his own bakery in the heart of our country’s modern artisanal food scene.
Bien Cuit tells the story of Golper’s ongoing quest to coax maximum flavor out of one of the world’s oldest and simplest recipes. Readers and amateur bakers will reap the rewards of his curiosity and perfectionism in the form of fifty bread recipes that span the baking spectrum from rolls and quick breads to his famous 24-day sourdough starter. This book is an homage to tradition, but also to invention. Golper developed many new recipes for this book, including several “bread quests,” in which he brilliantly revives some of New York City’s most iconic breads (including Jewish rye, Sicilian lard bread, Kaiser rolls, and, of course, bagels). You will also find palate-pleasing and innovative “gastronomic breads” that showcase his chef’s intuition and mastery of ingredients.
Golper’s defining technique comes at a time when American home cooks are returning to tradition-tested cooking methods and championing the DIY movement. Golper’s methods are relatively simple and easy to master, with recipes that require no modern equipment to make at home: just a bowl, an oven, and time—the dough does most of the work.
“Bien Cuit’s owner, Zachary Golper, demystifies and adapts bread recipes for home cooks (and tiny New York City kitchens)” —Alainna Lexie Beddie, T Magazine
“Zachary Golper is the epitome of the artisanal revival in North American baking, using his craft and patience to produce creative bread with soulful taste and texture. The smell of his delicious loaves will keep you going back to his Brooklyn Bakery, but now you can bake his recipes yourself at home.” —Daniel Boulud
“The essentials of the magical mystery of the creation of truly excellent bread are revealed so precisely and so poetically that even a novice bread maker like myself can join the party. This tome is destined for dirty and torn pages out of maximum usage in the working library in my kitchen.” —Mario Batali
“Chef Zachary Golper is both artisan and iconoclast, taking the best Old World techniques and infusing them with a radical spirit. Bien Cuit is a perfect addition to the bakers’ canon, and a beacon of the new bread revolution.” —Dan Barber
“The overall design of the book is stunning, with the classy looks of an art book, but the usability of a treasured kitchen friend…” —Village Voice
“The most serious book written about bread this year.” —Daniela Galarza, News Editor, Eater
“Renowned baker Zachary Golper provides his insider secrets for creating artisanal breads that will have even the most novice of chefs churning out loaves that rival the local boulangerie in no time.” —Libby MacCarthy, The Nest
“[Zachary Golper’s] debut cookbook is a stunner, full of beautiful food porny close-ups of bread.” —Laura Salkeld, Tasting Table
“The deal: If you’re going to learn from someone, this James Beard Award-nominated baker isn’t a bad way to go.” —Meredith Deliso, am New York
CHESTNUT HOLIDAY BREAD
makes 4 small loaves
Through much of Europe, especially in antiquity, chestnuts we re an important source of starch and protein before the introduction of wheat and, later, potatoes. This is not the cheapest bread in the book, simply because a can or jar of peeled chestnuts costs more than typical baking ingredients. However, you might find it a bit of a pa in to roast and peel chestnuts. (I definitely do.) If you purchase peeled chestnuts, it becomes a simple dump and stir process.
As in the Hazelnut Bread (page 111), for this recipe I use a nut pure e with milk, which ferments (page 41), I incorporate chunks of the featured ingredient (in this case, chestnuts) into the dough to create islands of contrasting texture and flavor in the finished loaf. As for the currants, well, those seemed appropriate for a holiday-themed bread. Come to think of it, while I’m doing this mini inventory of the inspirations for this bread, they’re informed by an impulse similar to that behind my Raisin Walnut Bread (page 132), only sweeter and with a softer crumb.
STARTER
50 grams (1/4 c + 2 tbsp) white flour 5 grams (11/4 tsp) granulated sugar
1 gram (generous 1/8tsp) fine sea salt
0.2 gram (pinch) instant yeast
44 grams (2 tbsp + 21/4 tsp) cold whole milk
CHESTNUT MILK
150 grams (1/2 c + 2 tbsp) chestnut puree
350 grams (11/4 c + 21/2 tbsp) cold whole milk
0.2 gram (pinch) fine sea salt
DOUGH
500 grams (31/2 c + 1 tbsp) white flour, plus additional as needed for working with the dough, and for the linen liner and shaped loaves
40 grams (31/2 tbsp) granulated sugar
15 grams (21/2 tsp) fine sea salt
5 grams (11/2 tsp) instant yeast
60 grams (31/2 tbsp) cold whole milk
45 grams (2 tbsp) Grade A maple syrup
150 grams (1 c) coarsely chopped roasted chestnuts
75 grams (1/4 c + 31/2 tbsp) dried currants
FOR THE STARTER
1 Stir together the flour, sugar, salt, and yeast in a medium storage container. Pour in the milk. Mix with your fingers, pressing the mixture into the sides, bottom, and corners until all of the flour is wet and fully incorporated. This starter is best if covered and left at room temperature for 6 hours, then chilled in the refrigerator for 6 hours. But if the timing is better, you can also leave it at room temperature for 2 to 3 hours and then move it to the refrigerator to chill for 9 to 12.
FOR THE CHESTNUT MILK
1 Whisk the chestnut puree, milk, and salt together in a medium saucepan and heat, stirring often, until steaming but not simmering, about 164°F (73°C). Remove from the heat and let cool to room temperature. Whisk again and refrigerate until ready to use.
FOR THE DOUGH
1 Stir together the flour, sugar, salt, and yeast in a medium bowl.
2 Whisk the chestnut milk, then pour about one-third of it around the edges of the starter to release it from the sides of the container. Transfer the starter and chestnut milk to an extra-large bowl along with the remaining chestnut milk, the milk, and the maple syrup. Using a wooden spoon, break the starter up to distribute it in the liquid.
3 Add the flour mixture, reserving about one-sixth of it along the edge of the bowl (see Mixing, page 282). Continue to mix with the spoon until most of the dry ingredients have been combined with the starter mixture. Switch to a plastic bowl scraper and continue to mix until incorporated. At this point the dough will be very sticky to the touch and have an almost gluey texture.
4 Push the dough to one side of the bowl. Roll and tuck the dough (see Rolling and Tucking, page 284), adding the reserved flour mixture and a small amount of additional flour to the bowl and your hands as needed, until the dough feels stronger and begins to resist any further rolling, about 16 times. Then, with cupped hands, tuck the sides under toward the center. Place the dough, seam-side down, in a clean bowl, cover the top of the bowl with a clean kitchen towel, and let rest at room temperature for 45 minutes.
5 For the first stretch and fold (see Stretching and Folding, page 285), lightly dust the work surface and your hands with flour. Using the plastic bowl scraper, release the dough from the bowl and set it, seam-side down, on the work surface. Gently stretch it into a roughly rectangular shape. Fold the dough in thirds from top to bottom and then from left to right. With cupped hands, tuck the sides under toward the center. Place the dough in the bowl, seam-side down, cover the bowl with the towel, and let rest for 45 minutes.
6 For the second stretch and fold, gently stretch the dough into a rectangle, scatter the chopped chestnuts and the currants evenly over the top, and press them gently into the dough. (For photos of the following process, see Incorporating Add-Ins, page 292.) Roll up the dough tightly from the end closest to you; at the end of the roll the dough will be seam-side down. Turn it over, seam-side up, and gently press on the seam to flatten the dough slightly. Fold in thirds from left to right and then do 1 roll and tuck sequence to incorporate the chestnuts and currants. Turn the dough seam-side down and tuck the sides under toward the center. Return the dough to the bowl, cover with the towel, and let rest for 45 minutes.
7 For the third and final stretch and fold, repeat the steps for the first stretch and fold, then return the dough to the bowl, cover with the towel, and let rest for 30 minutes.
8 Line a half sheet pan with a linen liner and dust fairly generously with white flour.
9 Lightly dust the work surface and your hands with flour. Using a bench scraper, divide the dough into 4 equal pieces. Press each piece into a 5-inch (13 cm) square, then roll into a loose tube about 5 inches (13 cm) long (see Shaping a Tube or Oval Loaf, page 294). Let rest for 5 minutes. Press each piece out again and then shape into a very tight tube about 8 inches (20 cm) long. Transfer to the lined pan, seam-side up, positioning the loaves across the width of the pan, rather than lengthwise. Dust the top and sides of the loaves with flour. Fold the linen to create support walls on both sides of each loaf, then fold any extra length of the linen liner over the top or cover with a kitchen towel. Transfer the pan to the refrigerator and chill for 14 to 20 hours.
10 Set up the oven with a baking stone and a cast-iron skillet for steam (see Baking Stones and Steam, page 296), then preheat the oven to 480°F (250°C).
11 Using the linen liner, lift and gently flip the loaves off the pan and onto a transfer peel, seam-side down. Slide the loaves, still seam-side down, onto a dusted baking peel (see Using a Transfer Peel and Baking Peel, page 311). Score the top of each (see Scoring, page 290). Working quickly but carefully, transfer the loaves to the stone using heavy-duty oven mitts or potholders. Pull out the hot skillet, add about 3 cups of ice cubes, then slide it back in and close the oven door. Immediately lower the oven temperature to 410°F (210°C). Bake, switching the positions of the loaves about two-thirds of the way through baking, until the crust is a rich golden brown, about 40 minutes.
12 Using the baking peel, transfer the loaves to a cooling rack. When the bottoms of the loaves are tapped, they should sound hollow. If not, return to the stone and bake for 5 minutes longer.
13 Let the bread cool completely before slicing and eating, at least 4 hours but preferably 8 to 24 hours.
EXCERPTED FROM BIEN CUIT: THE ART OF BREAD BY ZACHARY GOLPER AND PETER KAMINSKY. COPYRIGHT © 2015 BY ZACHARY GOLPER. EXCERPTED WITH PERMISSION BY REGAN ARTS. PHOTO THOMAS SCHAUER
~ Related Books ~


Leave a Reply