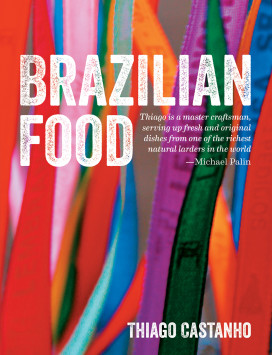


The Brazilian Kitchen100 Classic and Contemporary Recipes for the Home Cook
Like its soccer and samba, beautiful beaches and carnival, the cooking of Brazil is an explosion of color and flavor.
Leticia Moreinos – who spent her childhood in Rio’s paradise neighbourhood Ipanema – grew up eating Caldinho de Feijao all day and drinking fresh coconut water on the beach, and was homesick for this culture when she moved to New York to work in some of the world’s top restaurant kitchens. Cooking for herself, she went back to the Brigadeiros and Baba de Moca of her childhood but found that her palate had changed. She began to reinterpret classic Brazilian dishes as a chef, making them a little lighter and less sweet for our health-conscious age and a lot easier to recreate at home. The result is this groundbreaking collection of easy-to-make, easy-to-love recipes. With simple techniques and well-explained directions, dishes such as Salmon no Risotto de Caipirinha (Salmon over a Caipirinha Risotto) and Bolinho Quente de Doce de Leite com Sorbet de Coalhada (Molten Dulce de Leche Cake with a Sour Cream Sorbet) will become part of your everyday cooking repertoire and bring a welcome Copacabana-borne breeze into every home kitchen.
Leticia Moreinos Schwartz was born in Rio de Janeiro, Brazil and moved to New York in 1997. After graduating from the French Culinary Institute she worked in the kitchens of many of the top New York City restaurants. In 2000 she moved to Connecticut and started her own catering and cooking instruction business, teaching at schools such as The Institute of Culinary Education and the French Culinary Institute where she has built up a loyal following. www.chefleticia.com
‘The Brazilian Kitchen by Leticia Moreinos Schwartz focuses on the little known but increasingly popular cuisine of Brazil, where colonists, immigrants and native influences have created a food that is as diverse as it is unique.’
-ABC News
‘Chef Leticia, a native of Brazil who now lives in the United States, brings a unique perspective on Brazilian cuisine. She cooks up authentic recipes as well as reinvented dishes that blend together her international flair for cooking. The Brazilian Kitchen is a groundbreaking collection of easy-to-make, easy-to-love recipes. With simple techniques and well-explained directions, dishes like Salmon no risotto de Caipirinha (Salmon over a Caipirinha Risotto) and Bolinho Quente de Doce de Leite com Sorbet de Coalhada (Molten Dulce de Leche Cake with a Sour Cream Sorbet) will simply become part of your everyday cooking repertoire and bring a welcome Copocabana-born breeze into every hom kitchen. With its beautiful beaches, festive carnival, sensual dances, champion soccer teams, and now the Olympics, Brazil is one of the world s hot spots and popular travel destinations. One thing that cannot be overlooked is the country s magnificent food.’
-Global Chefs
‘Brazilian culture has gradually been seeping into our lives and cook Leticia Moreinos Schwartz, who was born in Ipanema, has written Cook Brazilian, a recipe book containing more than 100 easy-to-follow recipes, from salads, soups and desserts to the classic Caipirinha cocktail.’
-Oxford Times
Bean Fritters, Fish in Spiced Honey,
Chicken Braised with Caramelised Onions,
Coconut Cheesecake with Guava Sauce
Bean Fritters (p.31)
Acarajé

This fritter is probably the biggest symbol of African culture in Brazil. For over two centuries they have been sold in the streets of Bahia, a large state on Brazil’s eastern coast, as a snack.
Acarajés look like big oval meatballs with a reddish brown crust and a grainy soft bean purée on the inside, and one really is a meal in itself. I wanted to prepare this famous fritter in a smaller version while still keeping its authenticity. Dendê (palm) oil (see Glossary on page 170) can be rather expensive, so I use half dendê and half rapeseed oil (if you use only rapeseed oil, the fritters won’t achieve their beautiful reddish colour). The batter is prepared with uncooked beans, as they will cook when they are fried. If you use cooked or tinned beans, the batter will simply melt away in the oil. These acarajés can stand up to lots of hot seasoning.
Makes about 25 small fritters
175g (6 oz) dried black-eyed beans
1 small onion, diced
sea salt and freshly ground black pepper
pinch of cayenne pepper
pinch of Spanish paprika
475ml (17fl oz) rapeseed oil
475ml (17fl oz) dendê oil
1 Place the beans in a bowl and cover them with cold water.
2 Leave the beans to soak at room temperature uncovered, for at least 12 hours, preferably 24 hours, changing the water at least once (or any time you see that the water has turned brown). Discard any floating shells.
3 Drain the beans and spread them onto a baking sheet lined with kitchen paper so that they air-dry completely, about 5 minutes. Place the beans in the food processor with the onion. With the machine running, add some salt and black pepper and the cayenne and paprika and process until it is finely ground.
4 Pour the oils into a large heavy-based saucepan or casserole and heat the oil to 180˚C/350˚F, as measured with a deep-fat thermometer. If you don’t have a thermometer, drip a bit of batter into the oil – when you hear a sizzling sound and see the batter turning golden brown, the oil is ready. Using 2 ovalshaped teaspoons, make little quenelles by scooping a bit of batter and transferring it from one spoon to another, putting some pressure against the spoons as you create the shape of a quenelle. Drop them directly into the hot oil.
Only add as many as will fit in the oil without touching each other. Turn occasionally with a long slotted spoon, making sure all sides are browned evenly, about 3 minutes.
5 Transfer the fritters to a baking sheet lined with a double thickness of kitchen paper to absorb any extra oil. Continue working in batches until all the fritters are cooked. Keep the finished batches in a warm oven until serving. Serve immediately with a side of Vatapá (see page 78). These can be reheated in a 150˚C/300˚F/Gas Mark 2 oven for 5–10 minutes.
BLACK-EYED BEANS
Black-eyed beans, or black-eyed peas, are the original bean used in this recipe, but you could also use haricot beans. Be advised that the beans have to be soaked but cannot be precooked.
This recipe would not work with canned beans or cooked beans, as it would turn out too mushy.
Fish in Spiced Honey (p.80)
Filet de Peixe ao Mel Picante
My friends Patty and Sergey Boyce are beekeepers in Connecticut, and I learned from them that honey can absorb a wide variety of flavours when infused with certain ingredients.
After a lesson on cooking with honey and a freshly harvested golden jar in my hands, I was inspired. After a few hours of marinating, you’ll be rewarded with a sweet-crusted fish that is full of flavour but with a delicate, snow white inside (you could try this with chicken, too).
Make sure to save some spiced honey to baste the fish while cooking, but do it at the end of the cooking process, otherwise the honey might caramelize and harden in the pan.
Serves 4
175ml (6fl oz) sherry vinegar
85g (3 oz) honey
1 tablespoon soy sauce
2 tablespoons freshly squeezed orange juice
1 cinnamon stick
1/2 teaspoon fennel seeds
4 cardamom pods
25g (1 oz) fresh root ginger, peeled and finely chopped
4 centre-cut, skinless halibut fillets, 175g (6 oz) each
sea salt and freshly ground black pepper
2 tablespoons extra virgin olive oil
1 Place the first 8 ingredients in a medium saucepan and bring to the boil. Reduce the heat to low and simmer until the liquid reduces to a light syrupy consistency, about 4–6 minutes. Remove from the heat and leave to cool completely in the pan. You can refrigerate the honey reduction in an airtight plastic container for up to 5 days.
2 Place the halibut fillets in a large ziplock plastic bag and pour all of the honey reduction (except 2–3 tablespoons) with all the spices into the bag. Rub the reduction around the fish until the fillets are evenly coated. Remove the air from the plastic bag and seal well. Place in the refrigerator for 3–5 hours.
3 Remove the fish from the refrigerator at least 20 minutes before cooking. Preheat the oven to 190˚C/375˚F/Gas Mark 5.
4 Remove the fish from the honey reduction and wipe off any remaining fennel seeds, but do not pat dry, as you want the sugar in the honey to glaze the fish. Season with salt and pepper.
5 Heat the olive oil in a large, ovenproof frying pan over a medium to high heat. Add the fish and cook until lightly golden brown, about 2–3 minutes per side. Pour the reserved reduction over the fish and transfer the pan to the oven. Bake until the fish is cooked through, about 5 minutes. Transfer the fish to 4 dinner plates and spoon any remaining reduction on top.
Chicken Braised with Caramelised Onions (p.98)
Galinha Moreninha
Lourdes Paixao is a wonderful grandmotherly figure who cooks by memory the food of her home in Minas Gerais, where most of the cuisine is hearty and earthy. She is the kind of cook who doesn’t use a chopping board – she holds vegetables with one hand and cuts them with a small knife in the other over a plastic bowl. She cooks under any circumstances, with any equipment, on any hob, and in any kitchen. One of her best dishes is this chicken dish, a cross between French onion soup and osso bucco. The onions are caramelized and the legs are slowly braised until the meat falls apart. The result is a velvety chicken stew, full of flavour.
Serves 4–6
4 whole chicken legs, cut into legs and thighs
sea salt and freshly ground pepper
2 tablespoons olive oil
125ml (4fl oz) Madeira
2 large onions, finely sliced
3 garlic cloves, sliced
700ml (11/4 pints) veal stock (see page 113)
2 plum tomatoes, peeled, deseeded and chopped
2 tablespoons chopped fresh parsley
1 Season the chicken pieces with salt and pepper.
2 Heat the olive oil in a large frying pan over a medium-high heat. Add the chicken pieces, skin-side down, and cook until they are golden brown, about 4 minutes per side. Transfer to a bowl and cover with foil.
3 Turn the heat to low and add the onions. Cook, stirring frequently, until they caramelise, about 25–30 minutes. If you see the onions burning on the sides, add a tablespoon of water.
4 Add the garlic and cook for another minute. Deglaze with the Madeira and reduce almost completely. Add the veal stock and bring to the boil.
5 Return the chicken to the pan and and any juices that have accumulated in the bowl. Braise over a very low heat for 2 hours, with the pan partly covered (if the liquid is too thin, remove the lid to evaporate).
6 Add the tomatoes, season with salt and pepper to taste and sprinkle with the fresh parsley. Serve over white rice or farofa (see page 128).
Coconut Cheesecake with Guava Sauce (p.158)
Cheesecake de Côco com Calda de Goiaba

This is a Brazilian take on a classic American dessert. I changed the regular digestive biscuit crust to a chocolate one (simply process the biscuits in the food processor until they’re a fine crumble) and added coconut. It’s very important to use unsweetened coconut, otherwise the crust will be sticky. The filling is a combination of Brazilian and American ingredients. It’s deliciously creamy and sets up quite well in the presence of gelatine. The guava sauce complements the cheesecake in a classic Brazilian way, while still remaining somewhat close in flavour to the strawberry or cherry sauces often used in the States. I used the guava juice in concentrated form, but you can also use frozen guava pulp by omitting the cornflour and cooking the pulp and sugar together until it thickens slightly.
GRATING COCONUT
The most practical form to buy coconut is dessicated and unsweetened. If, however, you prefer to use a fresh coconut, you will need a hammer and a screwdriver to crack it open. Break it up into chunks and peel off the brown skin from the coconut meat. Grate it finely for the crust and shave it more coarsely for the garnish. If the coconut you buy is not fine enough, just pass it through the food processor. You can also toast the coconut shavings. When you shave them, know that bigger is better. Place them in a 150˚C/300˚F/ Gas Mark 2 oven until they start to become lightly golden brown, about 3–5 minutes.
Serves 8–10
FOR THE CRUST
140g (5 oz) chocolate digestive biscuit crumbs
35g (11/4 oz) unsweetened finely grated coconut
1 teaspoon sugar
85g (3 oz) unsalted butter, melted and cooled
FOR THE FILLING
2 teaspoons unflavoured powdered gelatine
175ml (6fl oz) coconut milk
115g (4 oz) cream cheese, softened
150ml (5fl oz) condensed milk
125ml (4fl oz) cream
125ml (4fl oz) soured cream
1 tablespoon sugar
1 tablespoon Malibu
50g (13/4 oz) unsweetened grated coconut
For the guava sauce
1 tablespoon cornflour
475ml (17fl oz) guava juice, from concentrate
140g (5 oz) sugar
a few drops of freshly squeezed lemon juice, to taste
coconut shavings, lightly toasted
25-cm (10-inch) fluted flan tin or springform cake tin
1 Preheat the oven to 180˚C/350˚F/Gas Mark 4.
2 For the crust, in the bowl of a food processor or a mixer fitted with the paddle attachment, combine the biscuit crumbs, coconut and sugar. Process until well combined, then slowly drizzle in the butter until the crumbs are uniformly moist. Using your hands, press the mixture into the tin, patting into an even layer on the base and all the way up the side. Bake for 10–12 minutes, then cool on a wire rack.
3 Meanwhile, prepare the filling. In a small saucepan, sprinkle the gelatine over the coconut milk and give it a whisk. Allow the gelatine to soften for 5 minutes.
4 In another medium saucepan, bring the cream cheese and condensed milk to a light simmer over a medium heat. Whisk until smooth, then transfer to a bowl.
5 Over a low heat, bring the gelatine and coconut milk to a low simmer, just until the gelatine melts. Do not let it boil. Immediately pour into the cream cheese mixture, whisk well and let everything cool to room temperature.
6 In the bowl of an electric mixer fitted with the whisk attachment, whip the double cream and soured cream together. Gradually add the sugar and beat until the mixture forms medium peaks. Gently fold the whipped cream with a rubber spatula into the cream cheese mixture. Add the rum and the coconut while folding. Pour the filling into the cooled crust and refrigerate until set, about 4 hours.
7 Meanwhile, prepare the guava sauce. In a small bowl, whisk the cornflour with 3 tablespoons of the guava juice and set aside.
8 In a medium, heavy-based saucepan, bring the remaining guava juice and sugar to a simmer, whisking until hot. Add the cornflour mixture and bring everything to the boil, whisking constantly, until the sauce has thickened to a syrup. Add the lemon juice to taste. Transfer to an airtight container and chill in the refrigerator. (The sauce can be prepared up to 3 days in advance.)
9 Remove the cheesecake from the refrigerator 20–30 minutes before serving. Decorate with toasted coconut shavings and serve with the guava sauce drizzled on top.
~ Related Books ~