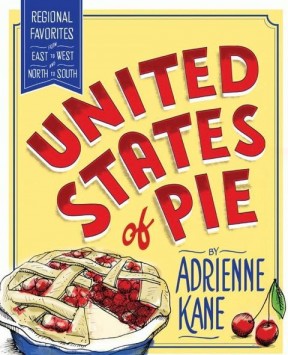


Milk Jar Cookies BakebookCookie, Cakes, Pies, and More for Celebrations and Every Day
Featuring seventy-five recipes for adorable, irresistible hand-rolled cookies, classic cakes and pies, no-bake treats, and homemade marshmallows. Milk Jar Cookies Bakebook more than delivers on owner Courtney Cowan’s motto, “Life’s short, eat cookies!”
Expert cookie baker and entrepreneur Courtney Cowan knows cookies are special-occasion desserts. Since 2013, Milk Jar Cookies has been L.A.’s favorite way to soothe a bad day, extend a great date, thank a helpful neighbor, or just grab a little sweet treat. Thousands of Instagram followers, regular placement on nationwide “Best Cookie” lists, and an exclusive partnership with Williams Sonoma make Milk Jar Cookies a trusted name in homemade comfort.
The Bakebook’s cookie recipes include all of Milk Jar’s specialty flavors, plus gluten-free variations, as well as easy recipes for homey cakes and pies; satisfying breakfast goodies; and impressive no-bake treats.
Courtney proves to be the home baker’s new best friend in the kitchen, with indispensable pro tips on baking technique and specialty ingredients and custom QR codes embedded throughout the book that take the reader to Milk Jar’s curated Spotify playlists for the perfect soundtrack to any sweet gathering.
Milk Jar Cookies owner and founder Courtney Cowan earned her baking stripes in her mother’s kitchen sneaking spoonfuls of cookie dough before making her name in Los Angeles and starting a made-to-order cookie business out of her studio apartment. The first Milk Jar Cookies shop opened in 2013 and became an instant hit with finicky L.A. locals and the food media alike, appearing in Oprah Magazine‘s Holiday 2017 issue, on the Today Show, and being named a “top gift for foodies” by Real Simple. Courtney’s own story has been featured in Forbes, Entrepreneur Magazine, and Create & Cultivate‘s Top 100.
CHOCOLATE-COVERED PRETZELS
CHOCOLATE-COVERED BANANA COOKIES
ENGLISH TOFFEE COOKIES
PUMPKIN PIE COOKIES
![]()
CHOCOLATE-COVERED PRETZELS
So. Much. Fun! And so easy. The options are endless. Perfect little salty-sweet treat. This isn’t a recipe so much as a creative license—go wild and have a great time. The key is to have a good, thick coating of chocolate so the ratio of chocolate to pretzel is satisfying in each bite.
Makes about 30 pieces
2 (12-ounce) bags chocolate chips (I prefer semisweet)
1 (12-ounce) bag pretzel rods
OPTIONAL GARNISHES:
Colored nonpareils
Chopped nuts
Sprinkles
Sanding sugars
Line a baking sheet with parchment paper.
In a medium saucepan, melt the chocolate chips on low heat, stirring regularly. Slow and steady is the name of the game here so the chocolate doesn’t burn and get clumpy. Once the chocolate is smooth, turn off the heat.
Dip one end of a pretzel rod into the chocolate, and, using a spoon, cover all but the end you’re holding in chocolate, spinning the rod for even coverage. Do this twice to ensure a nice, thick coating. Holding the rod over the saucepan, spin it a couple times, allowing the excess chocolate to fall back into the pan. Sprinkle with nonpareils or any of the other decorations you choose and then lay the pretzel rod flat on the parchment paper. Repeat to your heart’s content!
Store in an airtight container at room temperature for up to 2 weeks.
NOTE : You can also melt your chocolate chips in the microwave! In a microwave safe bowl, heat for 30 seconds then stir. Repeat as needed, stirring each time, until melted.
![]()
CHOCOLATE-COVERED BANANA COOKIES
Gowing up, no summer was complete without a family trip to the “LDQ” (dad’s nickname for the local Dairy Queen), and at least one of us would get a chocolate-covered banana. Color me happy when I moved to Los Angeles and could find them at every beachside snack stand! Spoiler alert—I felt compelled to create a cookie version of this classic. Banana chocolate dough combined with banana and chocolate chips, topped with a chocolate drizzle and crushed peanuts? It’s almost like the real thing! While it requires several extra steps to make, I promise it is well worth the work. I highly recommend freezing a handful, and when you’re ready to indulge, let the cookie(s) sit at room temperature for about twenty minutes before you dig in—they’ll be perfectly cold and chewy.
Makes 15 to 18 three-inch cookies
¾ cup dried banana chips, crushed, plus 15–18 whole chips for topping cookies
3½ cups all-purpose flour
⅓cup natural unsweetened cocoa powder
1 teaspoon baking soda
1 teaspoon table salt
11 tablespoons (or 2/3 cup) unsalted butter, cold and cubed
11 tablespoons (or 2/3 cup) vegetable shortening, room temperature
1 cup sugar
1 cup packed light brown sugar
2 extra-large eggs, cold
1½ teaspoons pure vanilla extract
1½ teaspoons pure banana extract
2½ cups (20 ounces) semisweet chocolate chips
Crushed peanuts, optional
Preheat the oven to 350°F.
With your hands, roughly crush ¾ cup of the dried banana chips into a bowl. Set aside.
In a medium bowl, stir together the flour, cocoa powder, baking soda, and salt. Set aside.
In a large mixing bowl or the bowl of a stand mixer, combine the butter, shortening, sugar, brown sugar, eggs, vanilla extract, and banana extract and beat on medium-low speed until mixed with just small chunks of butter remaining, approximately 30 seconds. Every time you mix ingredients, scrape down the sides of the bowl with a spatula to be sure all ingredients are included in the mix—every bit matters! Add half of the dry ingredient mixture and mix on low speed until just incorporated and no flour is visible, about 30 seconds. Add half of the remaining dry ingredients and mix on low speed until the flour is incorporated and all butter chunks are gone, approximately 20 seconds. Add the remaining dry ingredients and mix until the dough pulls away from the sides of the bowl and is not sticky to the touch, about 20 seconds. Be careful not to overmix—that’s how you get flat cookies. Stir in 1½ cups of the chocolate chips and the banana chips you crushed earlier.
Line two baking sheets with parchment paper. Scooping the dough 1/3 cup at a time, firmly roll into round balls approximately 1½ inches in diameter. With the dough ball still in your hands, top each cookie with 1 full banana chip, gently pushing it in to keep it in position while they bake. Place 6 cookies on each prepared baking sheet, spacing them out well. Bake on the middle and lower oven racks until you notice hairline cracks forming on the sides, 12 to 14 minutes, spinning each pan 180 degrees and swapping their positions halfway through.
Let the cookies cool on the baking sheets for 10 minutes, then use a wide spatula to transfer them to a wire rack or parchment paper on the counter to cool completely. Let the baking sheets cool before repeating with the remaining cookies.
When the cookies have cooled completely, it’s time to drizzle and top them! In a small, microwave-safe bowl, melt the remaining 1 cup chocolate chips in 30-second increments, stirring between each increment. Once the chocolate is melted, transfer to a piping bag with a skinny tip attached. Alternately, transfer to a plastic storage bag, work all the chocolate into one corner, and snip the corner off. In a zigzag motion and working from one side of each cookie to the other, drizzle the tops with chocolate. Sprinkle the top of each cookie with crushed peanuts, if desired. To accelerate the hardening of the chocolate and really get that “chocolate-covered” sensation, place your cookies in the refrigerator for 5 minutes before serving.
Store in an airtight container at room temperature for up to 4 days or freeze for up to a month.
![]()
ENGLISH TOFFEE COOKIES
The difference between American toffee and English toffee is the sugar. I personally prefer the flavor profile of English toffee, as it calls for more brown sugar, whereas American toffee usually calls for white sugar. This candy is an elegant addition to the blonde dough you’ve already learned to make. The toffee melts just enough in the oven, but still retains its trademark crunch. For the full experience, serve with a spot of tea. Cheerio!
Makes 15 to 18 three-inch cookies
2 cups (8 bars) finely chopped English toffee candy
4 cups all-purpose flour
1 teaspoon baking soda
1 teaspoon table salt
11 tablespoons (or 2/3 cup) unsalted butter, cold and cubed
11 tablespoons (or 2/3 cup) vegetable shortening, room temperature
1 cup sugar
1 cup packed light brown sugar
2 extra-large eggs, cold
1½ teaspoons pure vanilla extract
Preheat the oven to 350°F.
Set aside ½ cup of the finely chopped toffee candy in a small bowl. This will serve as your topping for the cookies.
In a medium bowl, stir together the flour, baking soda, and salt. Set aside.
In a large mixing bowl or the bowl of a stand mixer, combine the butter, shortening, sugar, brown sugar, eggs, and vanilla extract and beat on medium-low speed until mixed with just small chunks of butter remaining, approximately 30 seconds. Every time you mix ingredients, scrape down the sides of the bowl with a spatula to be sure all ingredients are included in the mix—every bit matters! Add half of the dry ingredient mixture and mix on low speed until just incorporated and no flour is visible, about 30 seconds. Add half of the remaining dry ingredients and mix on low speed until the flour is incorporated and all butter chunks are gone, approximately 20 seconds. Add the
remaining dry ingredients and mix until the dough pulls away from the sides of the bowl and is not sticky to the touch, about 20 seconds. Be careful not to overmix—that’s how you get flat cookies. Stir in the toffee candy pieces.
Line two baking sheets with parchment paper. Scoop the dough 1/3 cup at a time and firmly roll into round balls approximately 1½ inches in diameter. Before placing 6 cookies on each prepared baking sheet, roll the top of each dough ball in the toffee bits you set aside. Bake on the middle and lower racks of the oven until the tops are a light golden brown and you notice hairline cracks forming on the sides, 12 to 14 minutes, spinning each pan 180 degrees and swapping their positions halfway through.
Let the cookies cool on the baking sheets for 10 minutes, then use a wide spatula to transfer them to a wire rack or parchment paper on the counter to cool completely. Let the baking sheets cool before repeating with the remaining cookies.
Store in an airtight container at room temperature for up to 4 days or freeze for up to a month.
![]()
PUMPKIN PIE COOKIES
My favorite time of year at Milk Jar Cookies is the holiday season. For a company built on spreading joy and love, this is our time to shine. The pinwheels hanging in the window turn to falling leaves and pumpkins, the air gets a little crisper, and the smell of nutmeg and cinnamon wafts through the shop as we kick off the season with my cookie incarnation of the quintessential Thanksgiving dessert. The palpably magical energy the fragrance creates is something special, and I can’t wait for you to wrap yourselves up in this sensory hug.
P.S. The candied pecan topping is pure goodness and key to this cookie, and might I also suggest using some of the leftovers on a scoop of ice cream? Mmmmm . . . !
Makes 18 to 22 three-inch cookies
FOR THE CANDIED PECAN TOPPING:
4 cups pecan halves
1 tablespoon plus 1 teaspoon vegetable oil
¼ cup sugar
1 teaspoon ground cinnamon
1 teaspoon pumpkin pie spice
FOR THE COOKIES:
5½ cups all-purpose flour
2 teaspoons baking soda
1 teaspoon table salt
1 tablespoon plus 1 teaspoon pumpkin pie spice
1 teaspoon ground cinnamon
½ teaspoon ground nutmeg
11 tablespoons (or 2/3 cup) unsalted butter, cold and cubed
11 tablespoons (or 2/3 cup) vegetable shortening, room temperature
1 cup sugar
1 cup packed light brown sugar
2 extra-large eggs, cold
1½ teaspoons pure vanilla extract
1 cup 100 percent pure pumpkin puree
TO MAKE THE TOPPING: Preheat the oven to 375°F.
Using a knife, chop the pecan halves into pieces and transfer them to a medium bowl. Add the vegetable oil and toss to coat. Add the sugar, cinnamon, and pumpkin pie spice and toss until the nuts are evenly coated in spice mixture.
Line a baking sheet with parchment paper and spread the spiced pecans evenly across the pan. Bake for 10 minutes, rearranging them on the baking sheet halfway through for even toasting. Transfer back to the bowl and set aside. This topping can be made ahead of time and stored in an airtight container for up to 2 weeks.
TO MAKE THE COOKIES: Preheat the oven to 350°F.
In a medium bowl, stir together the flour, baking soda, salt, pumpkin pie spice, cinnamon, and nutmeg. Set aside.
In a large mixing bowl or the bowl of a stand mixer, combine the butter, shortening, sugar, brown sugar, eggs, and vanilla extract and beat on medium-low speed until mixed with just small chunks of butter remaining, approximately 30 seconds. Mix in the pumpkin puree until just combined. Every time you mix ingredients, scrape down the sides of the bowl with a spatula to be sure all ingredients are included in the mix—every bit matters! Add half of the dry ingredient mixture and mix on medium-low speed until just incorporated and no flour is visible, about 20 seconds. Add half of the remaining dry ingredients, mixing until no flour is visible and all the butter chunks are gone, about 20 seconds. Add the remaining dry ingredients and mix until no flour is visible and the dough is not sticky to the touch, about 30 more seconds.
Line two baking sheets with parchment paper. Scoop the dough 1/3 cup at a time and gently roll into round balls approximately 1½ inches in diameter. Press the top of each cookie into the bowl of candied pecans, coating the top, then place up to 8 cookies (pecan side up) on each prepared baking sheet, spacing them out well, and press the topping in to secure it. Note that the dough will be soft and the balls will softly flatten into discs approximately 2½ inches in diameter during this process. Bake on the middle and lower racks of the oven until the bottom edges are a deep orange and the centers no longer appear wet, yet are still dewy, 12 to 14 minutes, spinning each pan 180 degrees and swapping their positions halfway through.
Let the cookies cool on the baking sheet for 10 minutes, then use a wide spatula to transfer them to a wire rack to cool completely. Let the baking sheets cool before repeating with the remaining cookies.
Store in an airtight container at room temperature for up to 4 days or freeze for up to a month.
![]()
~ Related Books ~